本文最后更新于 2026年3月29日 晚上
生成根据天气信息切换背景图片接口的实现
根据天气信息切换背景图片接口的需求
根据用户IP地址解析出ip定位
然后根据定位获取用户所在地的天气信息
通过分析用户当前的天气传递天气类型给前端
其中解析IP地址获取定位用 ip2region来实现
获取天气信息则调用和风天气API来实现
aip半小时请求一次,或者有人刷新时请求
请求到的数据在redis中缓存半小时
代码实现
由于涉及到API调用,所以代码会复杂很多
首先还是传统的老三样Controller,ServiceImpl,Service
创建WeatherController
1
2
3
4
5
6
7
8
9
10
11
12
13
14
15
16
17
18
19
20
21
22
| @RestController
@RequestMapping()
@Api(tags = "天气", description = "天气相关接口")
public class WeatherController
{
@Autowired
private WeatherService weatherService;
@GetMapping("/weather/now")
@SystemLog(businessName = "获取当前天气")
@ApiOperation(value = "获取实时天气", notes = "根据位置获取实时天气信息,如果不传location则自动根据IP定位")
public ResponseResult getWeatherNow(
@ApiParam(value = "位置ID或经纬度,不传则自动根据IP定位")
@RequestParam(required = false) String location,
@ApiParam(value = "语言设置,默认zh")
@RequestParam(required = false, defaultValue = "zh") String lang,
@ApiParam(value = "单位制式,m=公制,i=英制,默认m")
@RequestParam(required = false, defaultValue = "m") String unit) {
return weatherService.getWeatherNow(location, lang, unit);
}
}
|
创建WeatherService

由于WeatherServiceImpl中涉及到的工具类和一些和相关代码比较多
要先把前期工作做好
准备工作
生成密钥对
首先由于是调用第三方API接口实现获取天气信息
所以要有相关密钥和相关配置类和工具类
先从拿到密钥开始
先要注册和风天气开发者账号
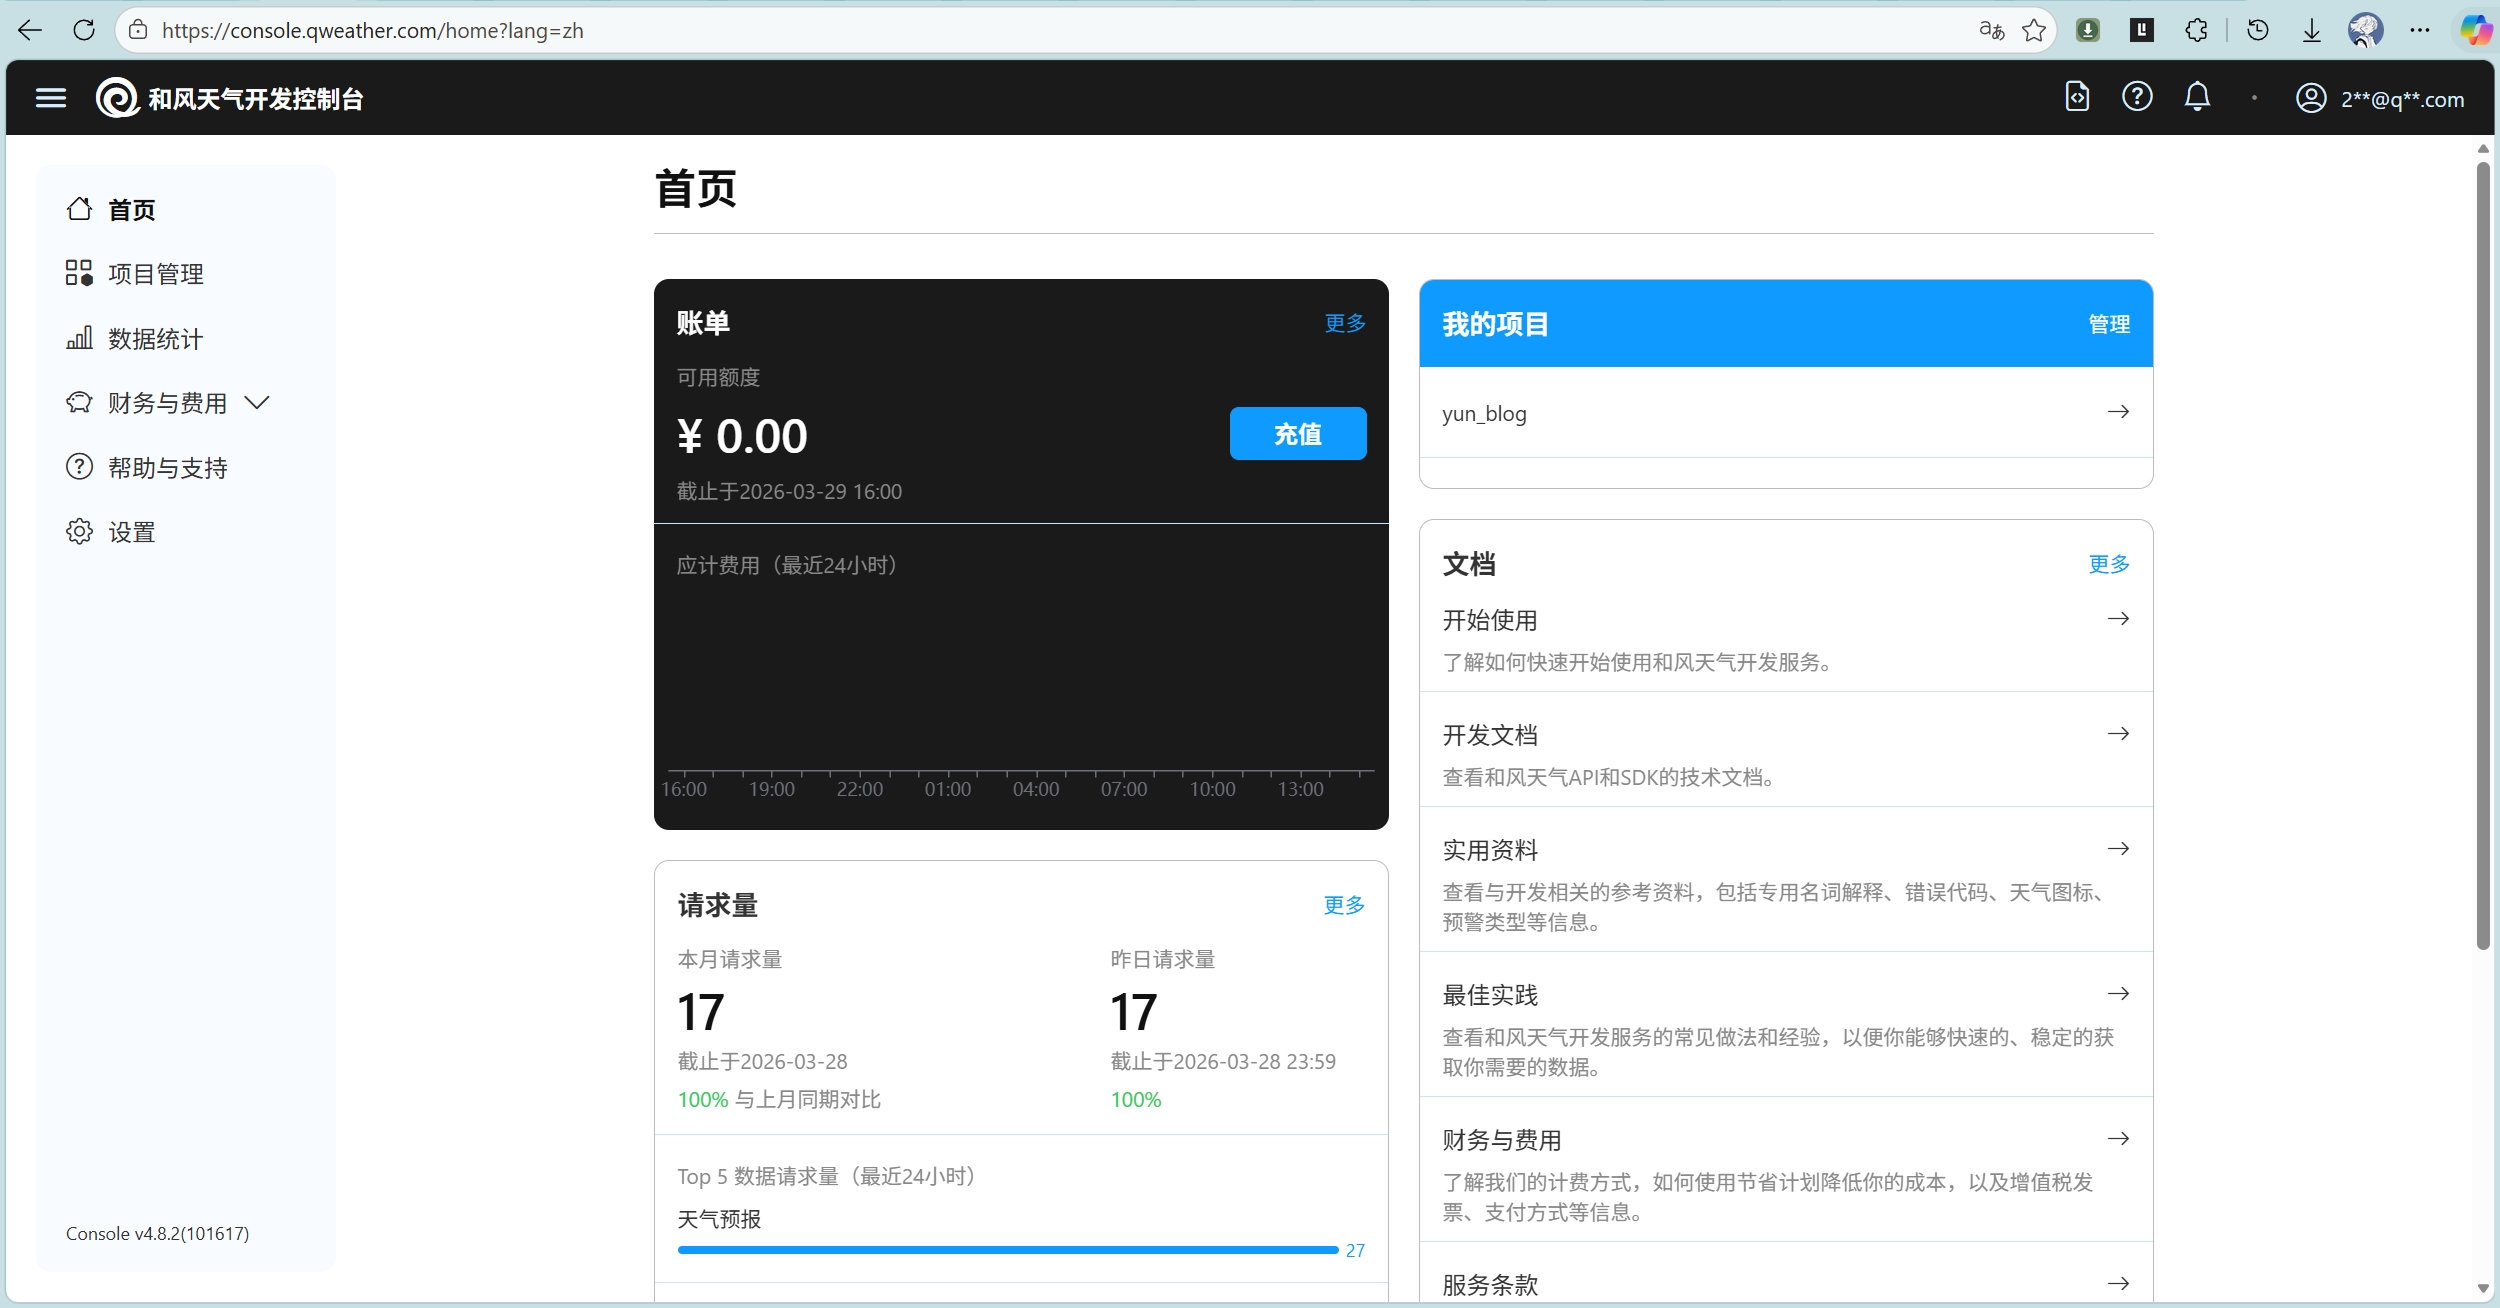
然后创建项目和JWT凭据

JWT凭据的创建需要用工具属于你的公钥去创建
下面使用 Ed25519KeyGenerator 工具类来生成密钥对
1
2
3
4
5
6
7
8
9
10
11
12
13
14
15
16
17
18
19
20
21
22
23
24
25
26
27
28
29
30
31
32
33
34
35
36
37
38
39
40
41
42
43
44
45
46
47
48
49
50
51
52
53
54
55
56
57
58
59
60
61
62
63
64
65
66
67
68
69
70
71
72
73
74
75
76
77
78
79
80
81
82
83
84
85
86
87
88
89
90
91
92
93
94
95
96
97
98
99
100
101
102
103
104
|
public class Ed25519KeyGenerator
{
public static void generateAndSaveKeys(String privateKeyPath, String publicKeyPath) throws Exception {
KeyPairGenerator keyPairGenerator = KeyPairGenerator.getInstance("Ed25519");
KeyPair keyPair = keyPairGenerator.generateKeyPair();
PrivateKey privateKey = keyPair.getPrivate();
PublicKey publicKey = keyPair.getPublic();
savePrivateKey(privateKey, privateKeyPath);
savePublicKey(publicKey, publicKeyPath);
System.out.println("密钥对生成成功!");
System.out.println("私钥保存在: " + privateKeyPath);
System.out.println("公钥保存在: " + publicKeyPath);
System.out.println("\n请将公钥内容上传到和风天气控制台:");
System.out.println("=".repeat(50));
printPublicKey(publicKey);
System.out.println("=".repeat(50));
}
private static void savePrivateKey(PrivateKey privateKey, String filePath) throws IOException {
String encoded = Base64.getEncoder().encodeToString(privateKey.getEncoded());
try (FileWriter writer = new FileWriter(filePath)) {
writer.write("-----BEGIN PRIVATE KEY-----\n");
writer.write(formatBase64(encoded));
writer.write("\n-----END PRIVATE KEY-----\n");
}
}
private static void savePublicKey(PublicKey publicKey, String filePath) throws IOException {
String encoded = Base64.getEncoder().encodeToString(publicKey.getEncoded());
try (FileWriter writer = new FileWriter(filePath)) {
writer.write("-----BEGIN PUBLIC KEY-----\n");
writer.write(formatBase64(encoded));
writer.write("\n-----END PUBLIC KEY-----\n");
}
}
private static void printPublicKey(PublicKey publicKey) {
String encoded = Base64.getEncoder().encodeToString(publicKey.getEncoded());
System.out.println("-----BEGIN PUBLIC KEY-----");
System.out.println(formatBase64(encoded));
System.out.println("-----END PUBLIC KEY-----");
}
private static String formatBase64(String base64) {
StringBuilder formatted = new StringBuilder();
int index = 0;
while (index < base64.length()) {
int end = Math.min(index + 64, base64.length());
formatted.append(base64, index, end);
if (end < base64.length()) {
formatted.append("\n");
}
index = end;
}
return formatted.toString();
}
public static void main(String[] args) {
try {
String privateKeyPath = "ed25519-private.pem";
String publicKeyPath = "ed25519-public.pem";
generateAndSaveKeys(privateKeyPath, publicKeyPath);
} catch (Exception e) {
System.err.println("生成密钥对失败: " + e.getMessage());
e.printStackTrace();
}
}
}
|
运行下面程序后会在项目根目录生成公钥(ed25519-public.pem)和私钥(ed25519-private.pem)
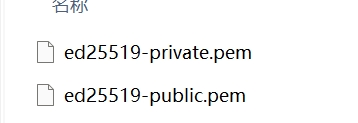
其中公钥用于生成你的项目凭据
私钥自己保管好不要泄露,后面调用aip要用私钥去合成 JWT身份认证 去使用
生成凭据之后你会得到一个凭据ID
JWT作为api请求链接的一部分他是必须要有的
JWT包含三个部分Header、Payload和Signature
其中Header里要包含你的凭据ID
Payload里要包含你凭据的项目ID
将上面两个用Base64URL就行编码
然后Signature里用的是你私钥通过进行Ed25519算法编译后的签名
最后将Base64URL编码后的Header、Payload和Signature使用英文句号拼接在一起组合成最终的token
像这样:header.payload.signature
下面使用自动程序来生成这串token
1
2
3
4
5
6
7
8
9
10
11
12
13
14
15
16
17
18
19
20
21
22
23
24
25
26
27
28
29
30
31
32
33
34
35
36
37
38
39
40
41
42
43
44
45
46
47
48
49
50
51
52
53
54
55
56
57
58
59
60
61
62
63
64
65
66
67
68
69
70
71
72
73
74
75
76
77
78
79
80
81
82
|
public class QWeatherJwtUtil {
public static String generateToken(String keyId, String projectId, String privateKeyPem, long validitySeconds) throws Exception
{
String privateKeyString = privateKeyPem
.replace("\\n", "\n")
.replace("-----BEGIN PRIVATE KEY-----", "")
.replace("-----END PRIVATE KEY-----", "")
.replaceAll("\\s+", "");
byte[] privateKeyBytes = Base64.getDecoder().decode(privateKeyString);
PKCS8EncodedKeySpec keySpec = new PKCS8EncodedKeySpec(privateKeyBytes);
KeyFactory keyFactory = KeyFactory.getInstance("EdDSA");
PrivateKey privateKey = keyFactory.generatePrivate(keySpec);
String headerJson = String.format("{\"alg\": \"EdDSA\", \"kid\": \"%s\"}", keyId);
long iat = ZonedDateTime.now(ZoneOffset.UTC).toEpochSecond() - 30;
long exp = iat + validitySeconds;
String payloadJson = String.format("{\"sub\": \"%s\", \"iat\": %d, \"exp\": %d}", projectId, iat, exp);
String headerEncoded = base64UrlEncode(headerJson.getBytes(StandardCharsets.UTF_8));
String payloadEncoded = base64UrlEncode(payloadJson.getBytes(StandardCharsets.UTF_8));
String data = headerEncoded + "." + payloadEncoded;
Signature signer = Signature.getInstance("EdDSA");
signer.initSign(privateKey);
signer.update(data.getBytes(StandardCharsets.UTF_8));
byte[] signature = signer.sign();
String signatureEncoded = base64UrlEncode(signature);
String jwt = data + "." + signatureEncoded;
return jwt;
}
private static String base64UrlEncode(byte[] data) {
return Base64.getUrlEncoder().withoutPadding().encodeToString(data);
}
}
|
为了方便生成token
我们需要将keyId 凭据ID(在和风天气控制台获取)projectId 项目ID(在和风天气控制台获取)privateKeyPem 私钥内容(PEM格式)添加到项目的配置文件中
如下图
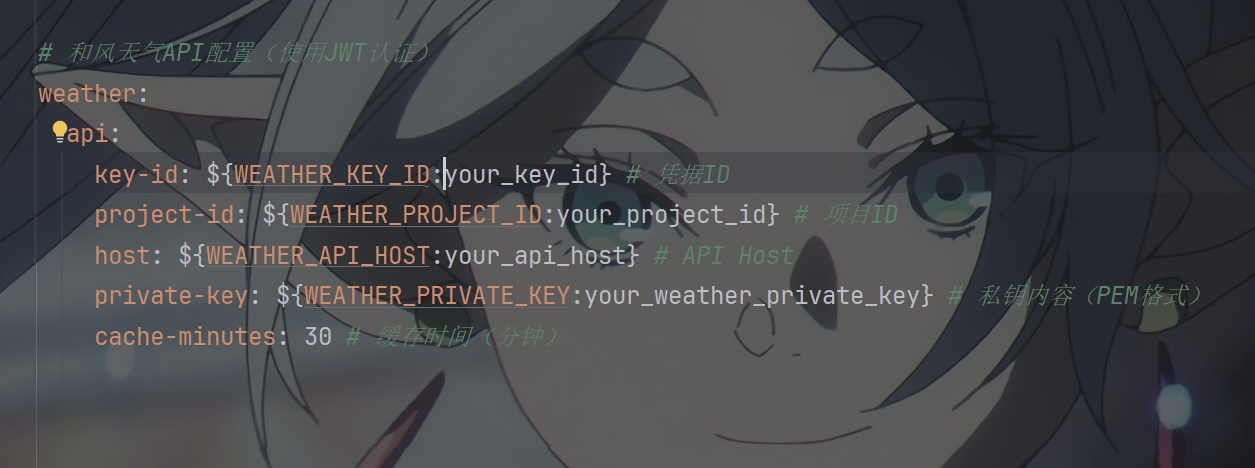
然后将你真正的私钥,id添加到环境变量中去
其中host在控制台设置里查看API Host,他也要添加到环境变量中
有了这些之后
我们就可以去结合请求接口来看是否能请求成功
生成请求链接
先在WeatherServiceImpl中写出合成请求API链接的方法
1
2
3
4
5
6
7
8
9
10
11
12
13
14
15
16
17
18
19
20
21
22
23
24
25
26
27
28
29
30
31
32
33
34
35
36
|
private ResponseEntity<QWeatherResponseVo<WeatherNowVo>> callWeatherApi(String location, String lang, String unit) throws Exception
{
String jwtToken = QWeatherJwtUtil.generateToken(keyId, projectId, privateKey, 900);
String url = UriComponentsBuilder
.fromHttpUrl("https://" + weatherApiHost + "/v7/weather/now")
.queryParam("location", location)
.queryParam("lang", lang)
.queryParam("unit", unit)
.build()
.toUriString();
HttpHeaders headers = new HttpHeaders();
headers.set("Authorization", "Bearer " + jwtToken);
headers.set("Accept", "application/json");
headers.set("Accept-Encoding", "gzip");
HttpEntity<String> entity = new HttpEntity<>(headers);
log.info("调用和风天气API: location={}, lang={}, unit={}, url={}", location, lang, unit, url);
return restTemplate.exchange(
url,
HttpMethod.GET,
entity,
new ParameterizedTypeReference<QWeatherResponseVo<WeatherNowVo>>() {}
);
}
|
生成location
到现在我们还差一步就能请求成功了
观察请求示例我们可以看到
请求体里必须包含location=''
这个location里的值为和风天气自己的城市对应的id值,那要怎么拿呢
在和风天气里提供了另外一个API接口来实现请求得到location GeoAPI
这个api的功能是可以让你查询到不同地区的Location ID
这个Location ID就是用在请求体里的
但我不选择去再调用一个api
我通过使用获取用户ip解析成ip定位
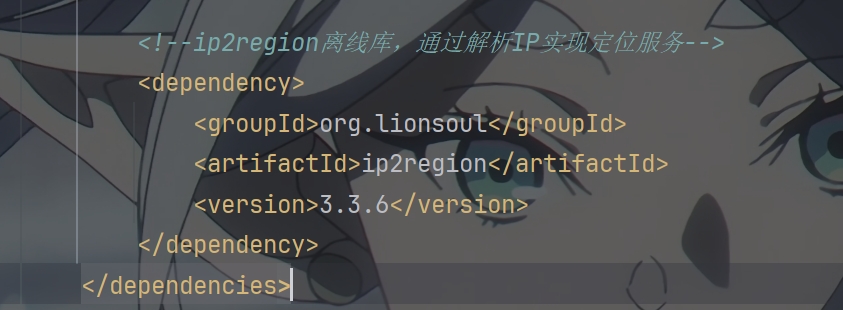
这要使用到上面提到的 ip2region 的离线IP地址定位库和IP定位数据
先用maven导入ip2region
找到对应的文件下载
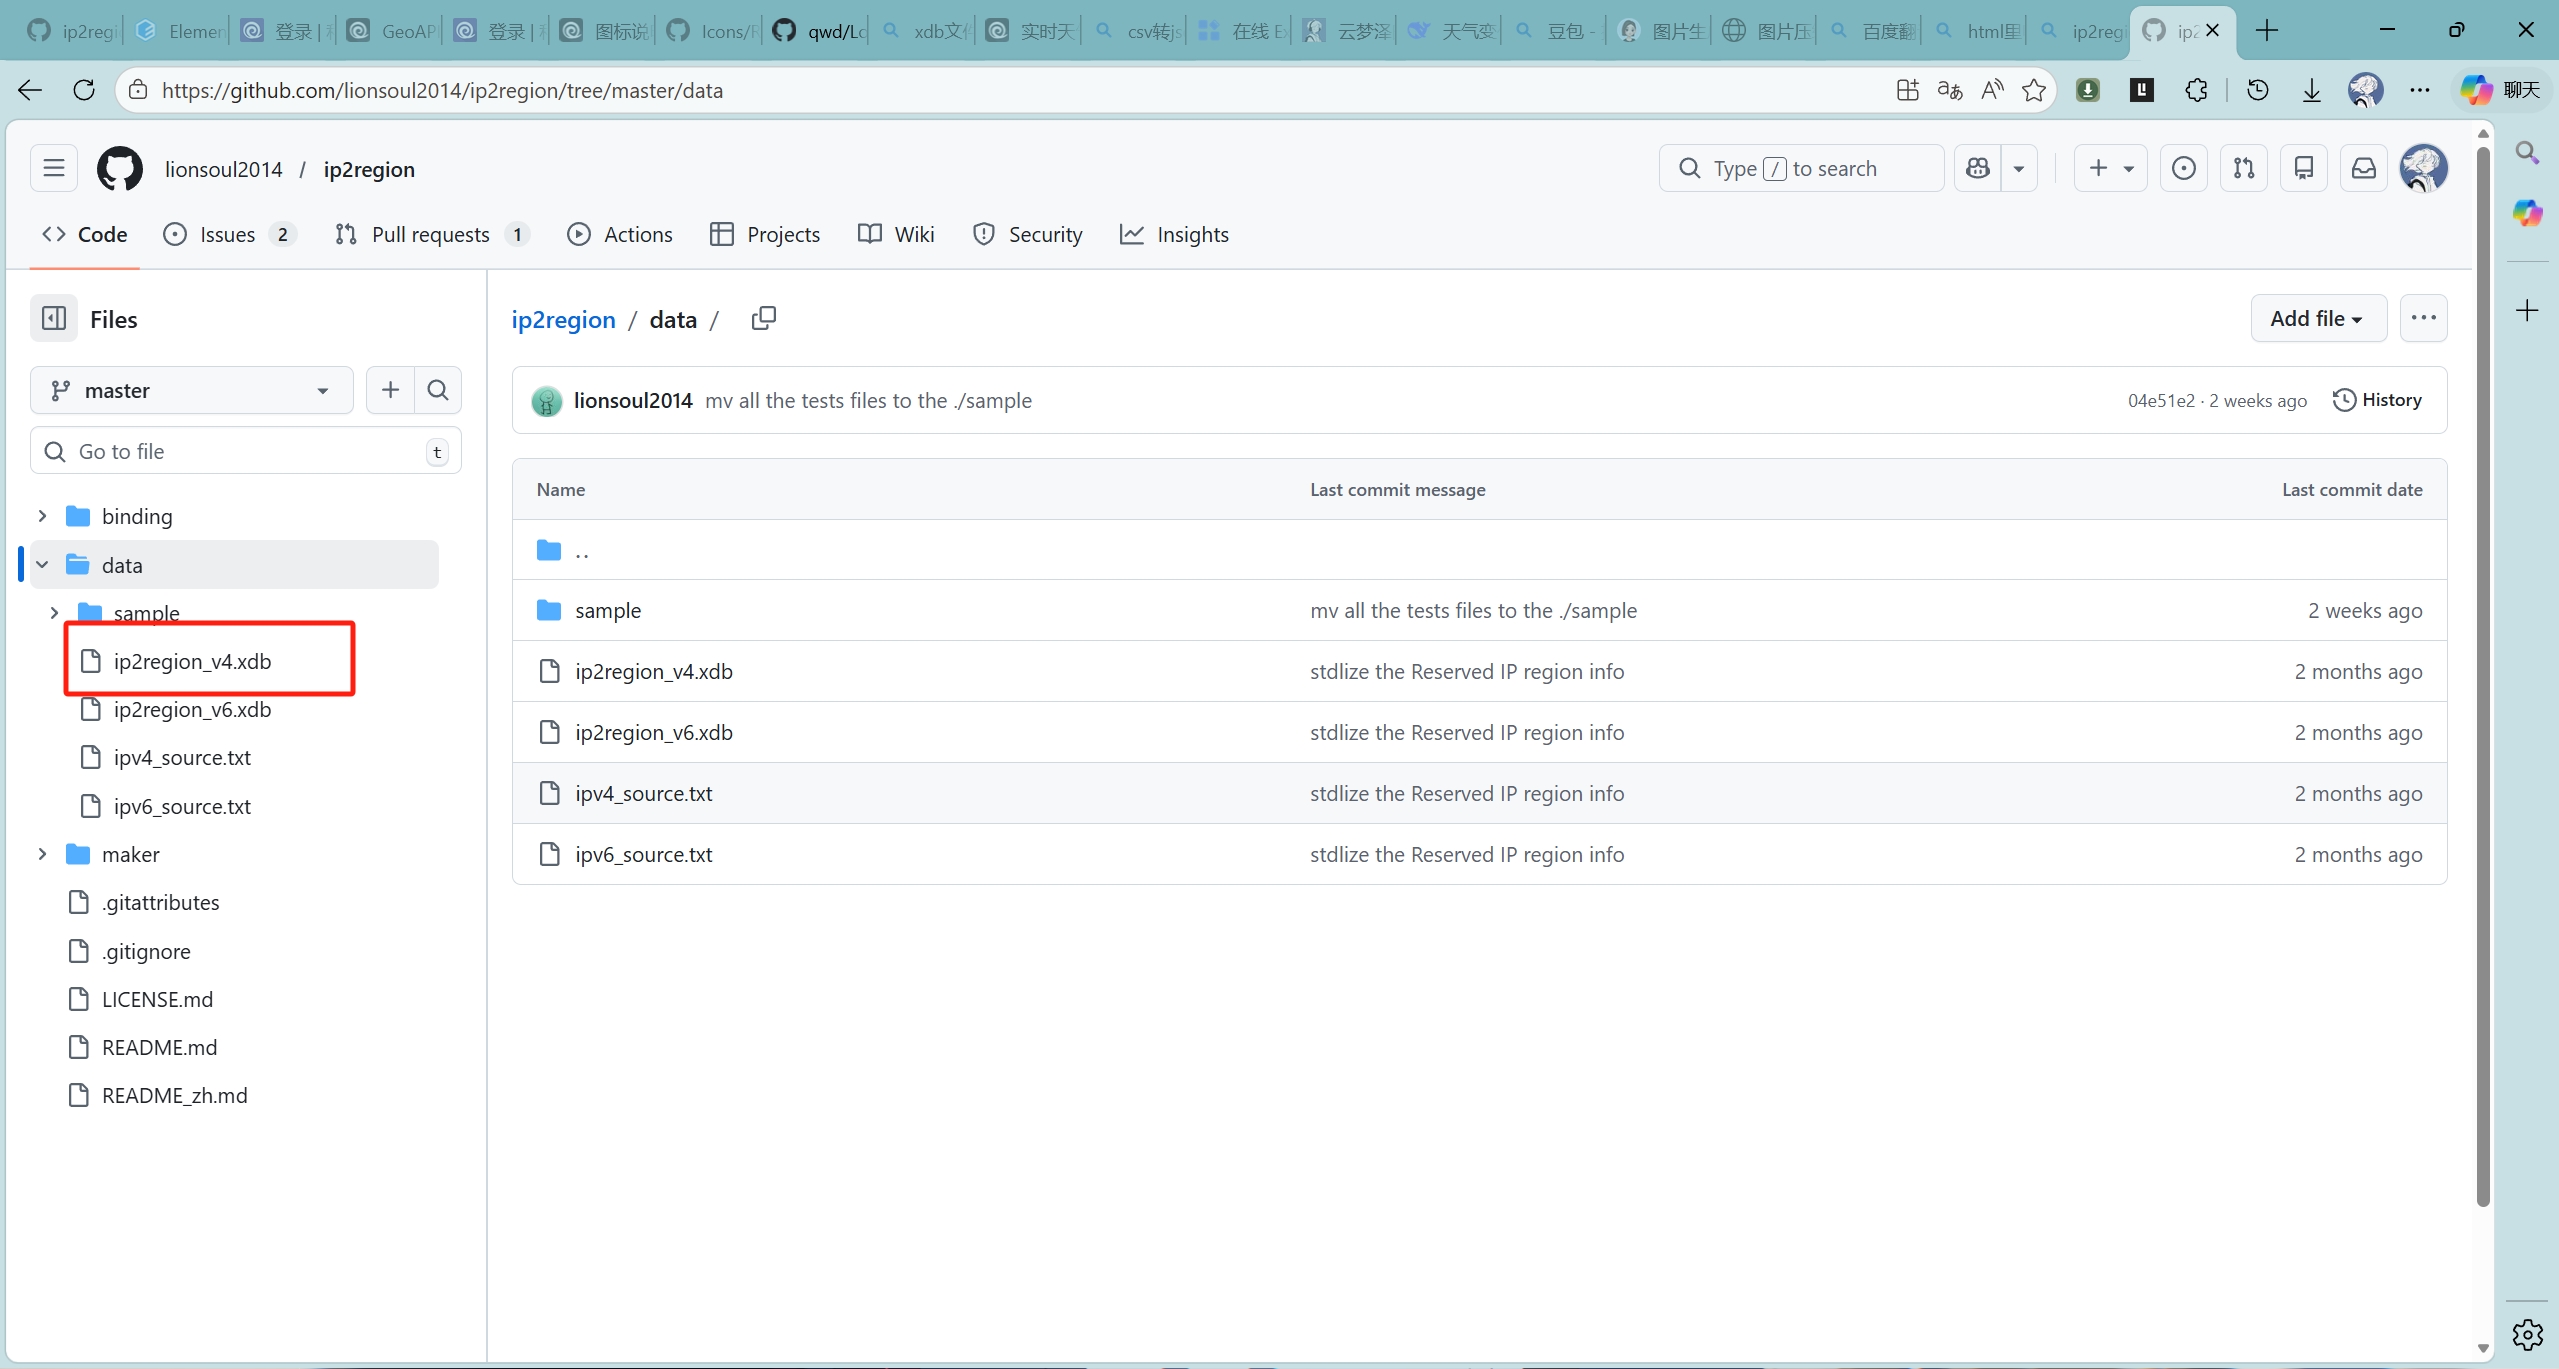
这里ip2region_v4对应的是Ipv4地址,你也可以下载v6的
解析IP地址成定位信息
然后创建IpLocationUtils工具类将获取到的IP地址转换成定位信息
1
2
3
4
5
6
7
8
9
10
11
12
13
14
15
16
17
18
19
20
21
22
23
24
25
26
27
28
29
30
31
32
33
34
35
36
37
38
39
40
41
42
43
44
45
46
47
48
49
50
51
52
53
54
55
56
57
58
59
60
61
62
63
64
65
66
67
68
69
70
71
72
73
74
75
76
77
78
79
80
81
82
83
84
85
86
87
88
89
90
91
92
93
94
95
96
97
98
99
100
101
102
103
104
105
106
107
108
109
110
111
112
113
114
115
|
@PostConstruct
public void init()
{
System.out.println(Searcher.class.getProtectionDomain().getCodeSource().getLocation());
try {
ClassPathResource resource = new ClassPathResource("ip2region_v4.xdb");
LongByteArray cBuff = Searcher.loadContentFromInputStream(resource.getInputStream());
searcher = Searcher.newWithBuffer(Version.IPv4, cBuff);
log.info("IP地址定位服务初始化成功");
} catch (Exception e) {
log.error("IP地址定位服务初始化失败: {}", e.getMessage(), e);
}
}
@PreDestroy
public void destroy()
{
if (searcher != null) {
try {
searcher.close();
log.info("IP地址定位服务已关闭");
} catch (IOException e) {
log.error("关闭IP地址定位服务失败: {}", e.getMessage(), e);
}
}
}
public static String getCityByIp(String ip)
{
if (ip == null || ip.isEmpty()) {
log.warn("IP地址为空,无法解析");
return null;
}
if (searcher == null) {
log.error("IP地址定位服务未初始化");
return null;
}
try {
String region = searcher.search(ip);
log.info("IP地址解析成功: ip={}, region={}", ip, region);
return region;
} catch (Exception e) {
log.error("IP地址解析失败: ip={}, error={}", ip, e.getMessage(), e);
return null;
}
}
public static String extractCityName(String region)
{
if (region == null || region.isEmpty()) {
return null;
}
try {
String[] parts = region.split("\\|");
if (parts.length < 4) {
return null;
}
String city = parts[3];
if (!"0".equals(city) && !city.isEmpty()) {
return city;
}
String province = parts[2];
if (!"0".equals(province) && !province.isEmpty()) {
return province;
}
return parts[0];
} catch (Exception e) {
log.error("提取城市名称失败: region={}, error={}", region, e.getMessage());
return null;
}
}
public static String getCityNameByIp(String ip) {
String region = getCityByIp(ip);
return extractCityName(region);
}
}
|
这样就可以根据IP地址得到地理定位了
上面提到的 location 需要的就是城市所对应的Location ID
但我们通过上面工具类得到的只是如:北京,上海,广州 这些文字的数据
要怎么转换成Location ID呢?
地名转换成 location
和风天气提供了国内地点城市对应的Location ID表 地点列表
到仓库里下载就行
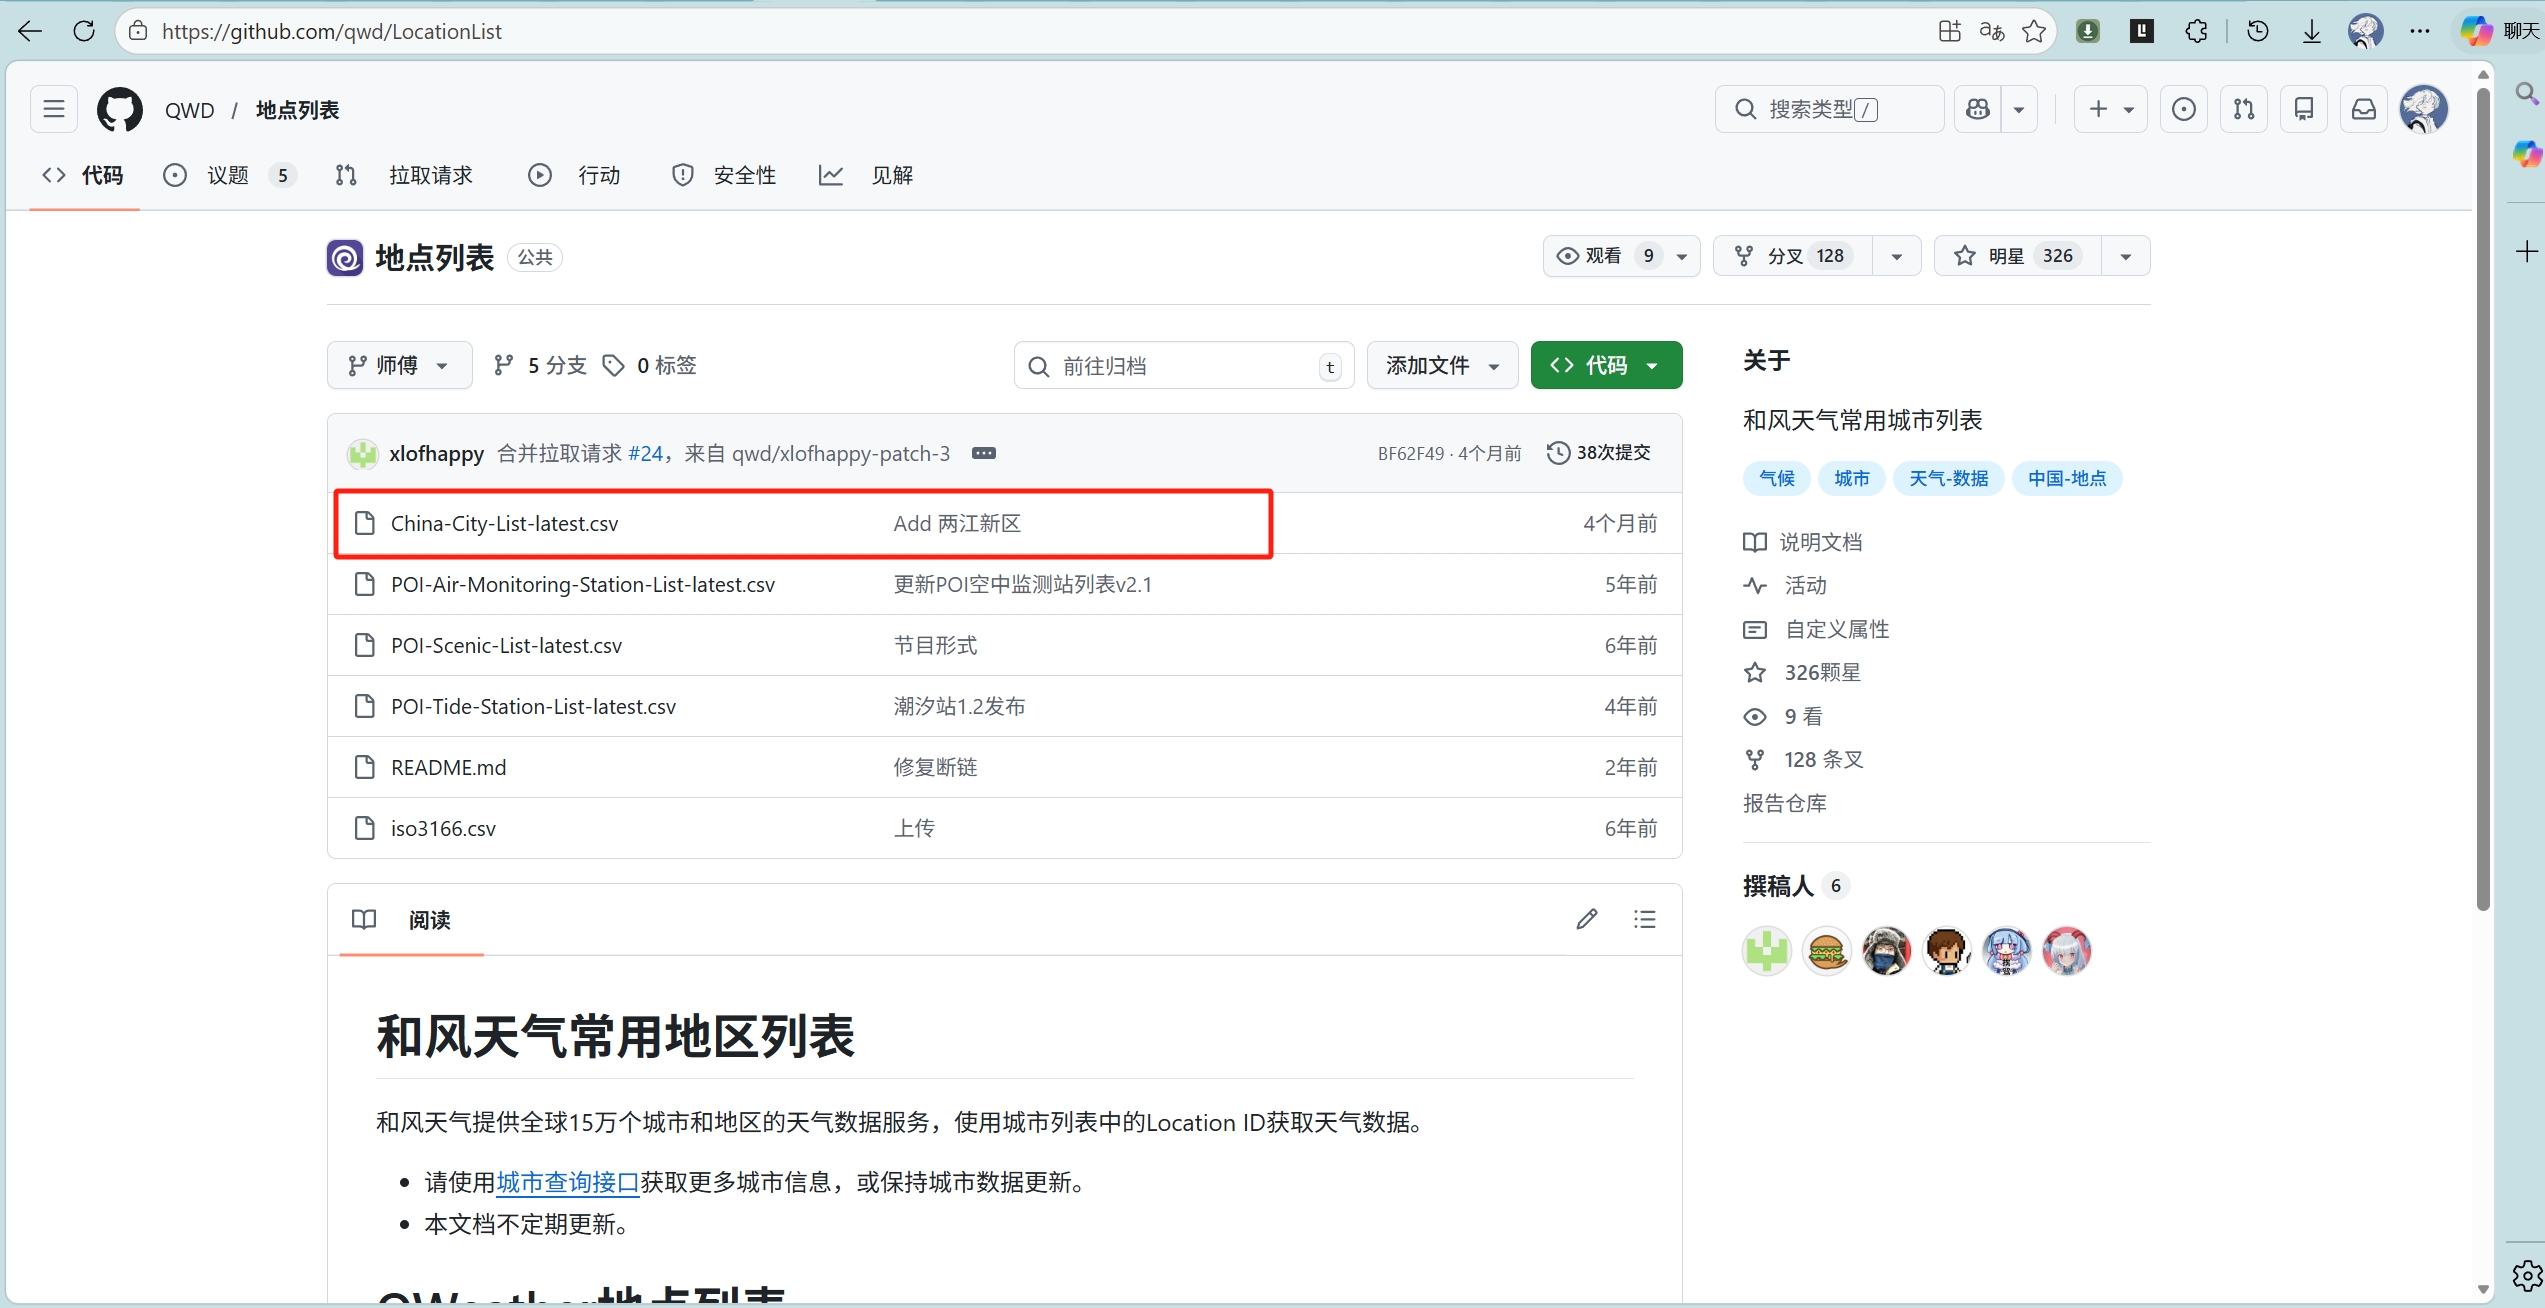
但是我们下载到的地点列表是.scv格式的
我这里将这个地点列表转换成json格式了
如果你有需要也可以这样转
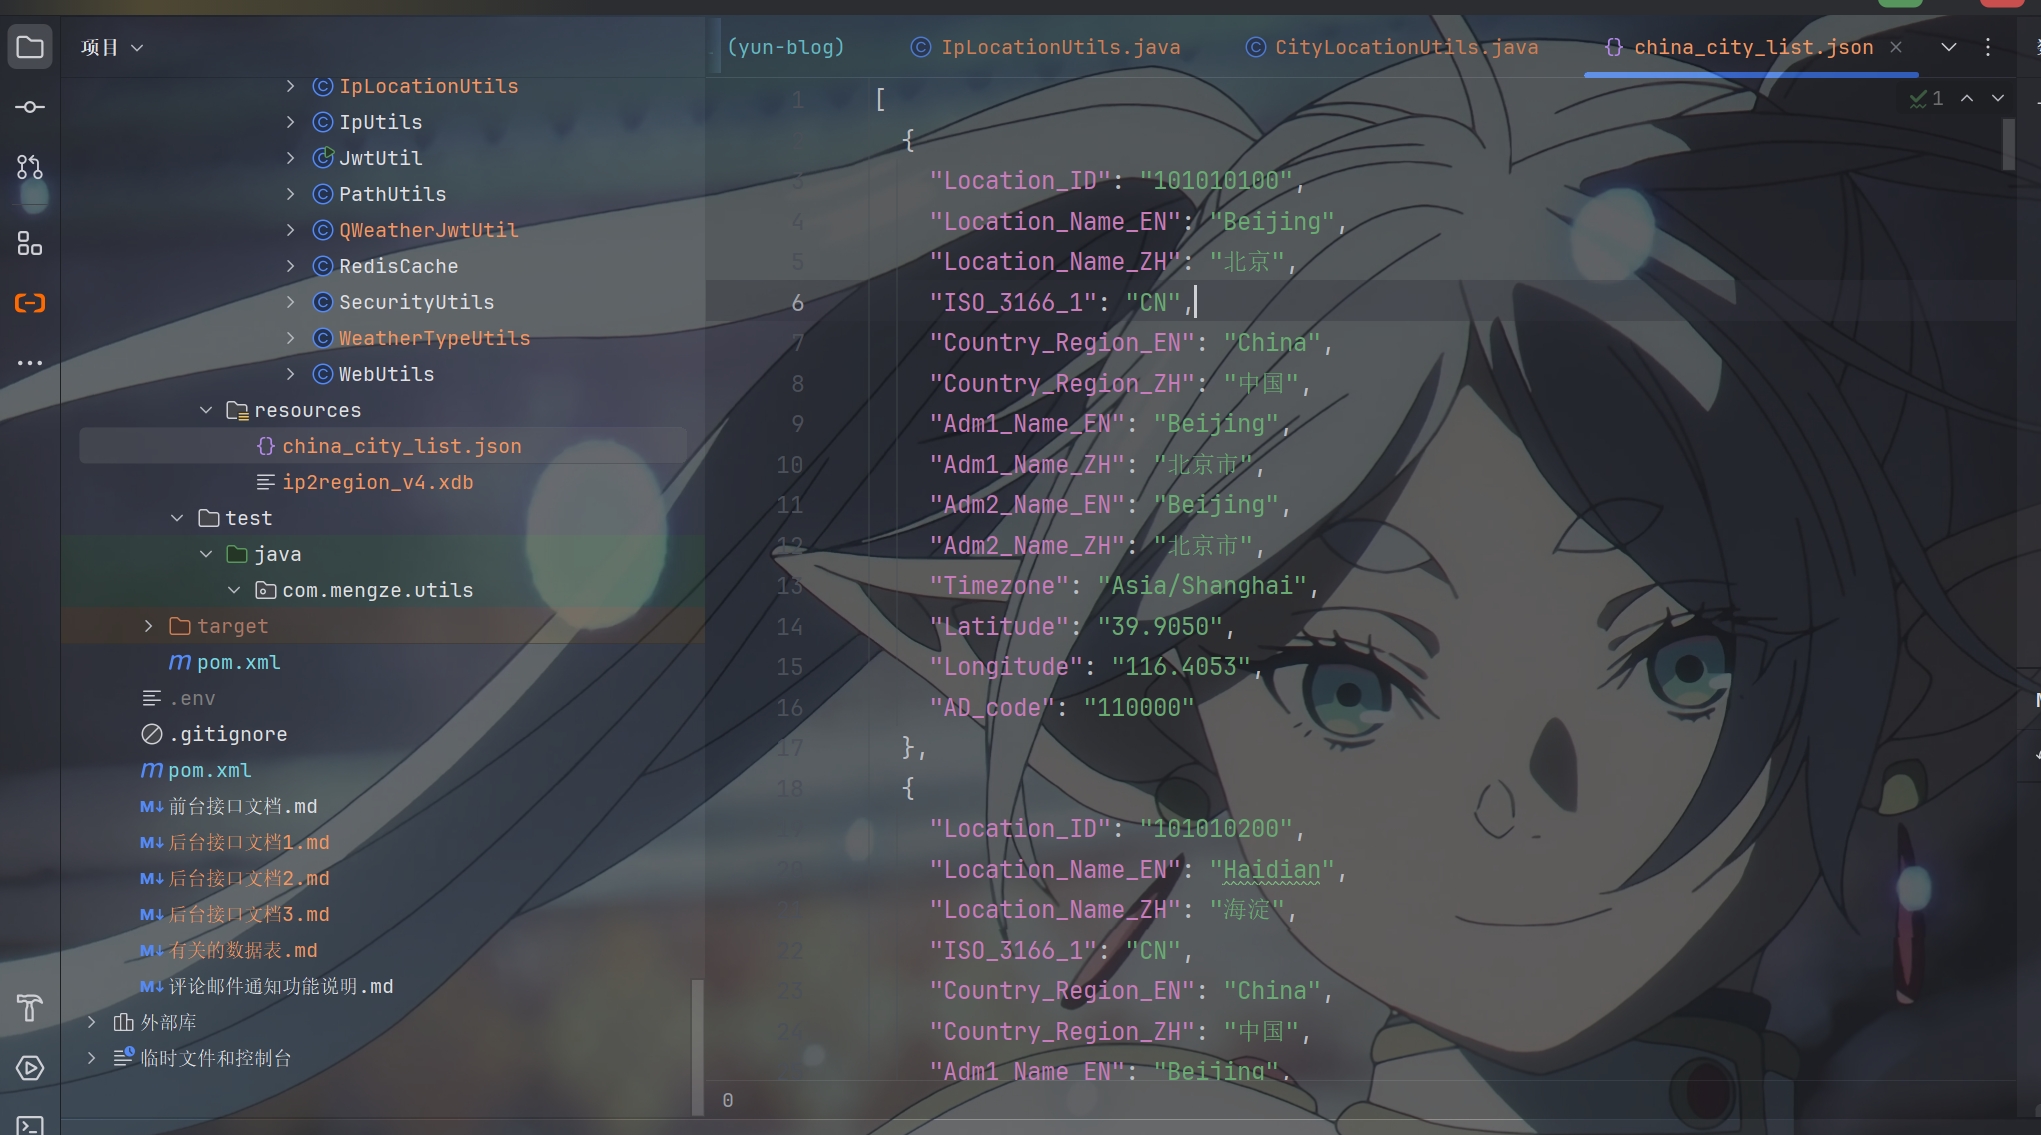
转成json格式之后就可以编写一个工具类来通过读取上面的城市名称来找到json文件里对应的Location ID了
然后再将这个Location ID传到location里
1
2
3
4
5
6
7
8
9
10
11
12
13
14
15
16
17
18
19
20
21
22
23
24
25
26
27
28
29
30
31
32
33
34
35
36
37
38
39
40
41
42
43
44
45
46
47
48
49
50
51
52
53
54
55
56
57
58
59
60
61
62
63
64
65
66
67
68
69
70
71
72
73
74
75
76
77
78
79
80
81
82
83
84
85
86
87
88
89
90
91
92
93
94
95
96
|
@Slf4j
@Component
public class CityLocationUtils {
private static Map<String, String> cityLocationMap = new HashMap<>();
@PostConstruct
public void init() {
log.info("开始初始化城市位置映射表...");
try {
ClassPathResource resource = new ClassPathResource("china_city_list.json");
if (!resource.exists()) {
log.error("找不到 china_city_list.json 文件,请确保文件在 classpath 中");
return;
}
log.info("找到 china_city_list.json 文件,开始加载...");
try (BufferedReader reader = new BufferedReader(
new InputStreamReader(resource.getInputStream(), StandardCharsets.UTF_8))) {
String jsonContent = reader.lines().collect(Collectors.joining());
JSONArray cityArray = JSON.parseArray(jsonContent);
log.info("JSON解析成功,城市数组大小: {}", cityArray.size());
for (int i = 0; i < cityArray.size(); i++) {
JSONObject city = cityArray.getJSONObject(i);
String locationNameZh = city.getString("Location_Name_ZH");
String locationId = city.getString("Location_ID");
if (StringUtils.hasText(locationNameZh) && StringUtils.hasText(locationId)) {
cityLocationMap.put(locationNameZh, locationId);
}
}
log.info("城市位置映射表初始化成功,共加载 {} 个国内城市", cityLocationMap.size());
log.info("示例城市映射 - 北京: {}", cityLocationMap.get("北京"));
log.info("示例城市映射 - 上海: {}", cityLocationMap.get("上海"));
}
} catch (Exception e) {
log.error("城市位置映射表初始化失败: {}", e.getMessage(), e);
}
}
public static String getLocationIdByCityName(String cityName) {
if (!StringUtils.hasText(cityName)) {
return cityName;
}
String locationId = cityLocationMap.get(cityName);
if (locationId != null) {
log.info("城市名称匹配成功: cityName={}, locationId={}", cityName, locationId);
return locationId;
}
String simplifiedName = cityName.replaceAll("[市省自治区特别行政区]", "");
locationId = cityLocationMap.get(simplifiedName);
if (locationId != null) {
log.info("城市名称模糊匹配成功: cityName={}, simplifiedName={}, locationId={}",
cityName, simplifiedName, locationId);
return locationId;
}
for (Map.Entry<String, String> entry : cityLocationMap.entrySet()) {
if (entry.getKey().contains(simplifiedName) || simplifiedName.contains(entry.getKey())) {
log.info("城市名称包含匹配成功: cityName={}, matchedCity={}, locationId={}",
cityName, entry.getKey(), entry.getValue());
return entry.getValue();
}
}
log.warn("未找到城市对应的Location_ID,使用原城市名称: cityName={}", cityName);
return cityName;
}
}
|
请求成功
再将所有的参数通过上面的 callWeatherApi 方法进行拼接就能得到正确的请求地址了
通过正确的请求地址就能得到响应数据
如下
1
2
3
4
5
6
7
8
9
10
11
12
13
14
15
16
17
18
19
20
21
22
23
24
25
26
27
28
29
30
31
32
| {
"code": "200",
"updateTime": "2020-06-30T22:00+08:00",
"fxLink": "http://hfx.link/2ax1",
"now": {
"obsTime": "2020-06-30T21:40+08:00",
"temp": "24",
"feelsLike": "26",
"icon": "101",
"text": "多云",
"wind360": "123",
"windDir": "东南风",
"windScale": "1",
"windSpeed": "3",
"humidity": "72",
"precip": "0.0",
"pressure": "1003",
"vis": "16",
"cloud": "10",
"dew": "21"
},
"refer": {
"sources": [
"QWeather",
"NMC",
"ECMWF"
],
"license": [
"QWeather Developers License"
]
}
}
|
观察响应数据我们可以逆向封装好QWeatherResponseVo用于你的接口的原始数据返回
1
2
3
4
5
6
7
8
9
10
11
12
13
14
15
16
17
18
19
20
21
22
23
24
25
26
27
28
29
30
|
@Data
public class QWeatherResponseVo<T> implements Serializable {
@JsonProperty("状态码")
private String code;
@JsonProperty("天气数据更新时间")
private String updateTime;
@JsonProperty("当前数据的响应式页面,便于嵌入网站或应用")
private String fxLink;
@JsonProperty("now")
private T now;
@JsonProperty("refer")
private Refer refer;
@Data
public static class Refer implements Serializable {
@JsonProperty("数据来源")
private String[] sources;
@JsonProperty("许可证")
private String[] license;
}
}
|
设置自定义响应数据
当然也可以不用他的数据响应格式
我这里对原始的响应数据进行再封装
得到我想要的响应数据WeatherNowVo
1
2
3
4
5
6
7
8
9
10
11
12
13
14
15
16
17
18
19
20
21
22
23
24
25
26
27
28
29
30
31
32
33
34
35
36
37
38
39
40
41
42
43
44
45
46
47
48
49
50
51
52
53
54
55
56
57
58
59
60
61
62
63
64
65
66
67
68
69
70
71
72
73
|
@Data
@NoArgsConstructor
@AllArgsConstructor
@ApiModel(description = "实时天气信息")
public class WeatherNowVo implements Serializable {
@ApiModelProperty(value = "数据观测时间")
@JsonProperty("obsTime")
private String obsTime;
@ApiModelProperty(value = "温度,默认单位:摄氏度")
@JsonProperty("temp")
private String temp;
@ApiModelProperty(value = "体感温度,默认单位:摄氏度")
@JsonProperty("feelsLike")
private String feelsLike;
@ApiModelProperty(value = "天气状况的图标代码")
@JsonProperty("icon")
private String icon;
@ApiModelProperty(value = "天气状况的文字描述")
@JsonProperty("text")
private String text;
@ApiModelProperty(value = "风向360角度")
@JsonProperty("wind360")
private String wind360;
@ApiModelProperty(value = "风向")
@JsonProperty("windDir")
private String windDir;
@ApiModelProperty(value = "风力等级")
@JsonProperty("windScale")
private String windScale;
@ApiModelProperty(value = "风速,公里/小时")
@JsonProperty("windSpeed")
private String windSpeed;
@ApiModelProperty(value = "相对湿度,百分比数值")
@JsonProperty("humidity")
private String humidity;
@ApiModelProperty(value = "当前小时累计降水量,默认单位:毫米")
@JsonProperty("precip")
private String precip;
@ApiModelProperty(value = "大气压强,默认单位:百帕")
@JsonProperty("pressure")
private String pressure;
@ApiModelProperty(value = "能见度,默认单位:公里")
@JsonProperty("vis")
private String vis;
@ApiModelProperty(value = "云量,百分比数值")
@JsonProperty("cloud")
private String cloud;
@ApiModelProperty(value = "露点温度")
@JsonProperty("dew")
private String dew;
@ApiModelProperty(value = "天气类型(前端使用)")
@JsonProperty("weatherType")
private String weatherType;
}
|
处理天气类型
观察上面的响应数据你能看到 "text": "多云"
我前端写的接口是接收后端传来的 weatherType 来进行不同背景图片的切换
但这么多类型的天气名称怎么对应上这么少背景图片呢
这样我们还要写一个工具类来实现将大致类型的天气对应成一个天气类型(weatherType)
那这个工具类就得支持模糊查询了,如下
1
2
3
4
5
6
7
8
9
10
11
12
13
14
15
16
17
18
19
20
21
22
23
24
25
26
27
28
29
30
31
32
33
34
35
36
37
38
39
40
41
42
43
44
45
46
47
48
49
50
51
52
53
54
55
56
57
58
59
60
61
62
63
64
65
66
67
68
69
|
public class WeatherTypeUtils
{
public enum WeatherType {
SUNNY("sunny"),
OVERCAST("overcast"),
RAINING("raining"),
SNOWING("snowing"),
FOG("fog");
private final String value;
WeatherType(String value) {
this.value = value;
}
public String getValue() {
return value;
}
}
public static WeatherType getWeatherType(String weatherText) {
if (weatherText == null || weatherText.trim().isEmpty()) {
return WeatherType.SUNNY;
}
if (weatherText.contains("雪") || weatherText.contains("冰雹") ||
weatherText.contains("雨夹雪") || weatherText.contains("冻雨") ||
weatherText.contains("阵雨夹雪") || weatherText.contains("雨雪天气")) {
return WeatherType.SNOWING;
}
if (weatherText.contains("雨") || weatherText.contains("雷") ||
weatherText.contains("阵雨") || weatherText.contains("毛毛雨")) {
return WeatherType.RAINING;
}
if (weatherText.contains("阴") || weatherText.contains("多云") ||
weatherText.contains("少云")) {
return WeatherType.OVERCAST;
}
if (weatherText.contains("雾") || weatherText.contains("霾") ||
weatherText.contains("扬沙") || weatherText.contains("浮尘") ||
weatherText.contains("沙尘暴")) {
return WeatherType.FOG;
}
return WeatherType.SUNNY;
}
}
|
实现 WeatherServiceImpl 服务
通过上面这么多工具类的实现
我们现在就可以开始写 WeatherServiceImpl 类的具体实现了
1
2
3
4
5
6
7
8
9
10
11
12
13
14
15
16
17
18
19
20
21
22
23
24
25
26
27
28
29
30
31
32
33
34
35
36
37
38
39
40
41
42
43
44
45
46
47
48
49
50
51
52
53
54
55
56
57
58
59
60
61
62
63
64
65
66
67
68
69
70
71
72
73
74
75
76
77
78
79
80
81
82
83
84
85
86
87
88
89
90
91
92
93
94
95
96
97
98
99
100
101
102
103
104
105
106
107
108
109
110
111
112
113
114
115
116
117
118
119
120
121
122
123
124
125
126
127
128
129
130
131
132
133
134
135
136
137
138
139
140
141
142
143
144
145
146
147
148
149
150
151
152
153
154
155
156
157
158
159
160
161
162
163
164
165
166
167
168
169
170
171
172
173
174
175
176
177
178
179
180
181
182
183
184
185
186
187
188
189
190
191
192
193
194
195
196
197
|
@Service("weatherService")
@Slf4j
public class WeatherServiceImpl implements WeatherService
{
@Autowired
private RedisCache redisCache;
@Autowired
private RestTemplate restTemplate;
@Value("${weather.api.key-id}")
private String keyId;
@Value("${weather.api.project-id}")
private String projectId;
@Value("${weather.api.host}")
private String weatherApiHost;
@Value("${weather.api.cache-minutes:30}")
private Integer cacheMinutes;
@Value("${weather.api.private-key}")
private String privateKey;
private static final String WEATHER_CACHE_PREFIX = "weather:now:";
@Override
public ResponseResult getWeatherNow(String location, String lang, String unit)
{
location = resolveLocation(location);
lang = StringUtils.hasText(lang) ? lang : "zh";
unit = StringUtils.hasText(unit) ? unit : "m";
String cacheKey = WEATHER_CACHE_PREFIX + location + ":" + lang + ":" + unit;
WeatherNowVo cachedWeather = redisCache.getCacheObject(cacheKey);
if (cachedWeather != null) {
log.info("从缓存获取天气数据: location={}", location);
return ResponseResult.okResult(cachedWeather);
}
try {
ResponseEntity<QWeatherResponseVo<WeatherNowVo>> response = callWeatherApi(location, lang, unit);
return handleWeatherResponse(response, cacheKey, location);
} catch (Exception e) {
log.error("调用和风天气API异常: location={}, error={}", location, e.getMessage(), e);
return ResponseResult.errorResult(AppHttpCodeEnum.SYSTEM_ERROR.getCode(),
"获取天气信息异常:" + e.getMessage());
}
}
private String resolveLocation(String location)
{
String cityName;
if (StringUtils.hasText(location)) {
cityName = location;
log.info("使用传入的城市参数: {}", cityName);
} else {
cityName = resolveCityNameByIp();
}
String locationId = CityLocationUtils.getLocationIdByCityName(cityName);
log.info("城市名称转换为Location_ID: cityName={}, locationId={}", cityName, locationId);
return locationId;
}
private String resolveCityNameByIp()
{
try {
ServletRequestAttributes attributes = (ServletRequestAttributes) RequestContextHolder.getRequestAttributes();
if (attributes != null) {
HttpServletRequest request = attributes.getRequest();
String clientIp = IpUtils.getIpAddr(request);
log.info("客户端IP地址: {}", clientIp);
String cityName = IpLocationUtils.getCityNameByIp(clientIp);
if (StringUtils.hasText(cityName)) {
log.info("根据IP解析的城市: {}", cityName);
return cityName;
}
log.warn("IP地址解析城市失败,使用默认城市: 广州");
} else {
log.warn("无法获取请求上下文,使用默认城市: 广州");
}
} catch (Exception e) {
log.error("IP地址解析异常: {}", e.getMessage(), e);
}
return "广州";
}
private ResponseEntity<QWeatherResponseVo<WeatherNowVo>> callWeatherApi(String location, String lang, String unit) throws Exception
{
String jwtToken = QWeatherJwtUtil.generateToken(keyId, projectId, privateKey, 900);
String url = UriComponentsBuilder
.fromHttpUrl("https://" + weatherApiHost + "/v7/weather/now")
.queryParam("location", location)
.queryParam("lang", lang)
.queryParam("unit", unit)
.build()
.toUriString();
HttpHeaders headers = new HttpHeaders();
headers.set("Authorization", "Bearer " + jwtToken);
headers.set("Accept", "application/json");
headers.set("Accept-Encoding", "gzip");
HttpEntity<String> entity = new HttpEntity<>(headers);
log.info("调用和风天气API: location={}, lang={}, unit={}, url={}", location, lang, unit, url);
return restTemplate.exchange(
url,
HttpMethod.GET,
entity,
new ParameterizedTypeReference<QWeatherResponseVo<WeatherNowVo>>() {}
);
}
private ResponseResult handleWeatherResponse(ResponseEntity<QWeatherResponseVo<WeatherNowVo>> response,
String cacheKey, String location)
{
if (response.getStatusCode() != HttpStatus.OK || response.getBody() == null) {
log.error("调用和风天气API失败: status={}", response.getStatusCode());
return ResponseResult.errorResult(AppHttpCodeEnum.SYSTEM_ERROR.getCode(), "获取天气信息失败");
}
QWeatherResponseVo<WeatherNowVo> weatherResponse = response.getBody();
if (!"200".equals(weatherResponse.getCode())) {
log.error("和风天气API返回错误: code={}", weatherResponse.getCode());
return ResponseResult.errorResult(AppHttpCodeEnum.SYSTEM_ERROR.getCode(),
"获取天气信息失败,错误码:" + weatherResponse.getCode());
}
WeatherNowVo weatherNow = weatherResponse.getNow();
WeatherTypeUtils.WeatherType weatherType = WeatherTypeUtils.getWeatherType(weatherNow.getText());
weatherNow.setWeatherType(weatherType.getValue());
log.info("天气类型判断: text={}, weatherType={}", weatherNow.getText(), weatherType.getValue());
redisCache.setCacheObject(cacheKey, weatherNow, cacheMinutes, TimeUnit.MINUTES);
log.info("天气数据已缓存: location={}, cacheMinutes={}", location, cacheMinutes);
return ResponseResult.okResult(weatherNow);
}
}
|
WeatherServiceImpl 类分析
上面 getWeatherNow 为主要实现方法
剩余的包括上面的 callWeatherApi 在内为辅助方法
resolveLocation 方法通过调用 CityLocationUtils 类里的方法实现 解析并获取城市位置
resolveCityNameByIp 方法通过调用 IpLocationUtils 类里的方法实现 根据客户端IP解析城市名称
callWeatherApi 方法的功能上面已经讲过
handleWeatherResponse 方法通过调用 WeatherTypeUtils 工具类来将各种天气转换成 weatherType (天气类别)传给前端
这样前端就可以通过接收不同的 weatherType 来进去不同背景图片的切换了
就像我现在所在的地区在下雨,他就会切换成下雨的背景图片


PS:该系列只做为作者学习开发项目做的笔记用
不一定符合读者来学习,仅供参考
预告
后续会记录博客的开发过程
每次学习会做一份笔记来进行发表
“一花一世界,一叶一菩提”
版权所有 © 2026 云梦泽
欢迎访问我的个人网站:https://hgt12.github.io/